Showing posts with label media editing. Show all posts

Jun 10, 2009

Embed subtitles in movies in 4 easy steps

In order to watch a movie with subtitles, you have to have a separate subtitles file for it. You can download the subtitles file easily by just googling the movie name. A subtitles file usually has a .srt extension. Now, the problem is that if you are moving the movie file to some other location say your portable media player or your cell phone, you will have to move the subtitles file too. But what if you could somehow embed the subtitles into the movie itself? that would save you from maintaining two separate files. But remember, once you embed the subtitles into the movie, you cannot remove it. So be careful while doing this. Another thing, if you want to do some editing like trimming or deleting some frames from the movie, do it after you have embedded the subtitles; otherwise you might not get the subtitles exactly in the desired frames. 

For embedding subtitles in a movie, you will need three tools

i. Divxland Media Subtitler

ii. VirtualDub

iii. VirtualDub subtitler filter

1. To start with, first keep the movie and the subtitles file ready. Open Divxland Media Subtitler, Go to File>Open Video. Browse for the movie file and click open.


2. Now go to File>Open text or subtitles. Here, browse for the subtitles file. When you have done this, you will find the subtitles text list along with its timing in the left pane and the movie in the right pane of Divxland Media Subtitles window.


3.  Now go to File>Save as and select Substation Alpha [SSA] from the dropdown list and save it.

4. The last part is to embed the subtitles. Just go to File>Embed Subtitles Click Next the OK.

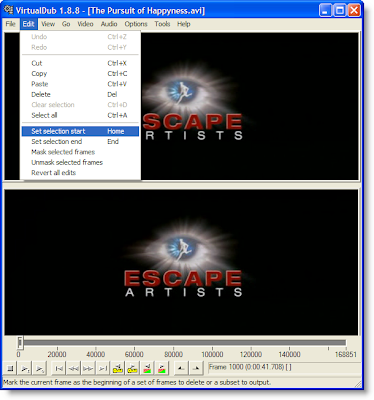
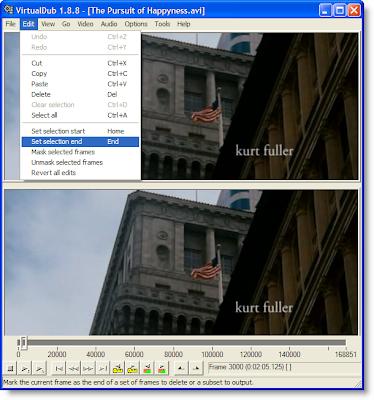
VirtualDub will open up and it will start embedding the subtitles in the movie. This process will take some time depending upon the length of the movie.

You can of course leave it running in the background. When it is done, you have your movie complete with embedded subtitles.

Jun 4, 2009

Remove TV commercials or unwanted scenes from recorded videos

I was looking for a neat way of removing unwanted scenes from some of the movies in my collection. After a lot of research, I found the cure. You may want to do away with those annoying advertisements in between your favorite recorded TV shows or explicit scenes in a movie not suitable for family viewing. There is a way of getting rid of them easily without hampering the audio or video quality. Many people suggest Windows Movie Maker, but I found a little bit confusing and tedious. Moreover, it takes hours to get the final processed video.
So, all you need for this job is a free nifty tool called Virtual Dub. Here is how to get started:

1. Launch Virtual Dub, open the video file you want to edit by going to File>Open Video File.

2. Slide the Seek Bar to the beginning of the frame you want to remove.

Eg. If you want to remove the frames 1000 to 3000, place the slider at frame no. 1000

3. Click on Edit, then Click ‘Set Selection Start’


4. Move the seek bar to the final frame (frame no. 3000in this case) and Click ‘Set Selection end’ from edit menu.


5. Now, Click edit and then click delete.


6. Click on video, and the click ‘Direct Stream Copy’


7. Now you have to save the edited movie, for that, go to File>Save as AVI.


8. Saving will take some time depending on the length and size of the video you are editing.

That’s it! Check the final edited file, its size will be just a few MBs less than the original file.